- Make sure both the printer and the host machine are off.
- Connect the RS-232 cable to the back of the printer and on the back of the scale, balance or indicator.

- Once the cable is connected, make sure the printer is connected to a plug.
- Make sure the scale or balance is plugged in or has enough battery life to operate.
- Turn the scale on.
- Use the ON/OFF switch to turn the printer on. Hold the “LF” key (situated near the LED) on at the same time. The LED should light up, indicating the printer is on.
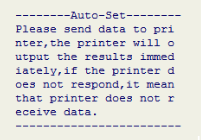
- This should start the automatic settings. The printer will print the following:

- Once this prints, you can release the “LF” key.
- Press the “PRINT” key on your scale. Please note that some scales have keys that do multiple functions, so the key could say other things.
- The scale or balance will start transferring data and will print it.
- If the printout is correct, press the “LF” key on the AIP printer to return to normal operation.
How to Set Up the AIP’s Parameters on a Computer
- Unplug the AIP printer.
- Connect the AIP printer to your PC using the USB cable.
- Start the Easy Setup software. You will see the following screen:

- You should see the following message: “Read… OK. Printer is connected”
- Go through the settings and set them however you like.
- Once you’re done setting the parameters, click “Set to Printer” to save your changes. If you don’t, the printer will revert back to default settings.
- Close the Program.
- Unplug the AIP printer from your PC.

